黑群晖利用 NPS 做内网穿透
介绍
nps 是一款轻量级、高性能、功能强大的内网穿透代理服务器。目前支持 tcp、udp 流量转发,可支持任何 tcp、udp 上层协议(访问内网网站、本地支付接口调试、ssh 访问、远程桌面,内网 dns 解析等等……),此外还支持内网 http 代理、内网 socks5 代理,可实现在非内网环境下如同使用 vpn 一样访问内网资源和设备的效果。
目前市面上提供类似服务的有花生壳、TeamView、GoToMyCloud 等等,但要使用第三方的公网服务器就必须为第三方付费,并且这些服务都有各种各样的限制,此外,由于数据包会流经第三方,因此对数据安全也是一大隐患。
为什么要用内网穿透?
举个例子,假如你家里有台 黑群晖NAS,然后你家里没有公网 IP 地址(现在很多的家庭网络都不会分配公网地址了),但是你又想在公司(外网)能访问你的 黑群晖NAS,这时候就需要用到内网穿透,来让你在公司(外网)也能访问家里的 黑群晖NAS 了~
这里用到的 docker 镜像:
https://hub.docker.com/r/oldiy/nps-server
https://hub.docker.com/r/oldiy/npc-client
nps 项目地址:
准备工作
环境
服务端:有公网 IP 的 centos7
客户端:群晖 NAS
软件:Xshell
域名解析
首先,要有个域名,然后到域名解析商那里做个域名解析,具体的自行百度,下面是一些阿里云解析的资料
参考资料:
https://help.aliyun.com/knowledge_detail/39397.html?spm=5176.13394938.0.0.43a22fc3ihtv5Y
https://help.aliyun.com/knowledge_detail/39783.html?spm=5176.13394938.0.0.43a22fc3ihtv5Y
https://jingyan.baidu.com/article/48b558e3f25e6d7f38c09aec.html
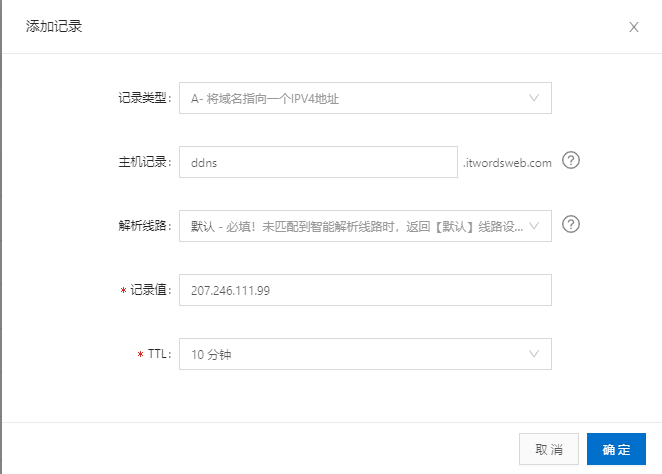
我配置的域名解析:

安装 docker
使用 Xshell 远程连接到服务端开始做配置
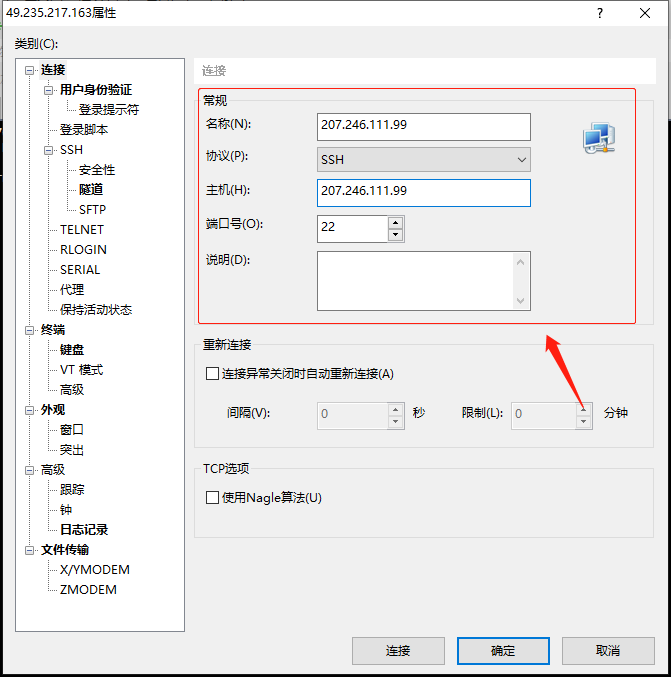
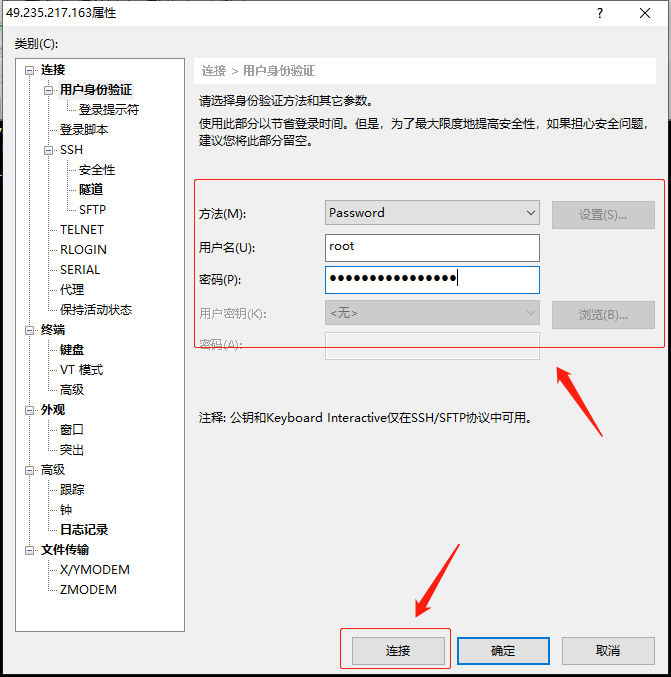
关闭防火墙(或者开启对应端口),安装 docker
[root@nas ~]# systemctl stop firewalld
[root@nas ~]# systemctl disable firewalld
Removed symlink /etc/systemd/system/multi-user.target.wants/firewalld.service.
Removed symlink /etc/systemd/system/dbus-org.fedoraproject.FirewallD1.service.
[root@nas ~]# curl https://download.docker.com/linux/centos/docker-ce.repo -o  /etc/yum.repos.d/docker.repo
[root@nas ~]# yum -y install docker-ce.x86_64
[root@nas ~]# systemctl start docker.service && systemctl enable docker.service
Created symlink from /etc/systemd/system/multi-user.target.wants/docker.service to /usr/lib/systemd/system/docker.service.
安装配置 nps 服务端
命令行配置
使用 docker 部署 nps 服务端
[root@nas ~]# mkdir -p /data/nps/conf
[root@nas ~]# docker run -d --privileged=true --name nps --net=host -v /data/nps/conf:/nps/conf --restart=always oldiy/nps-server:latest
Unable to find image 'oldiy/nps-server:latest' locally
latest: Pulling from oldiy/nps-server
c87736221ed0: Pull complete
279154eae597: Pull complete
9f3d73efe602: Pull complete
c6b3ecbbb567: Pull complete
Digest: sha256:e1b9889aee7b5faecbccf6d66f2d6db7ea280f0edc415e9f6cac8073ffd29ecc
Status: Downloaded newer image for oldiy/nps-server:latest
e0ceb8b49d5038a7f7fb516f44e6c739d54cc9ecb2ac0edfb5c5445aaf340608
[root@nas ~]# docker ps
CONTAINER ID        IMAGE                     COMMAND                  CREATED             STATUS              PORTS               NAMES
e0ceb8b49d50        oldiy/nps-server:latest   "/bin/sh -c /nps/nps…"   27 seconds ago      Up 26 seconds                           nps
在配置文件修改 web 登陆界面的密码(如果不修改的话,默认用户和密码为 admin/123)
[root@nas ~]# vi /data/nps/conf/nps.conf
web_password=OPS@123
[root@nas ~]# docker restart nps
web 端配置
使用浏览器登录 nps web 页面,端口为 8080
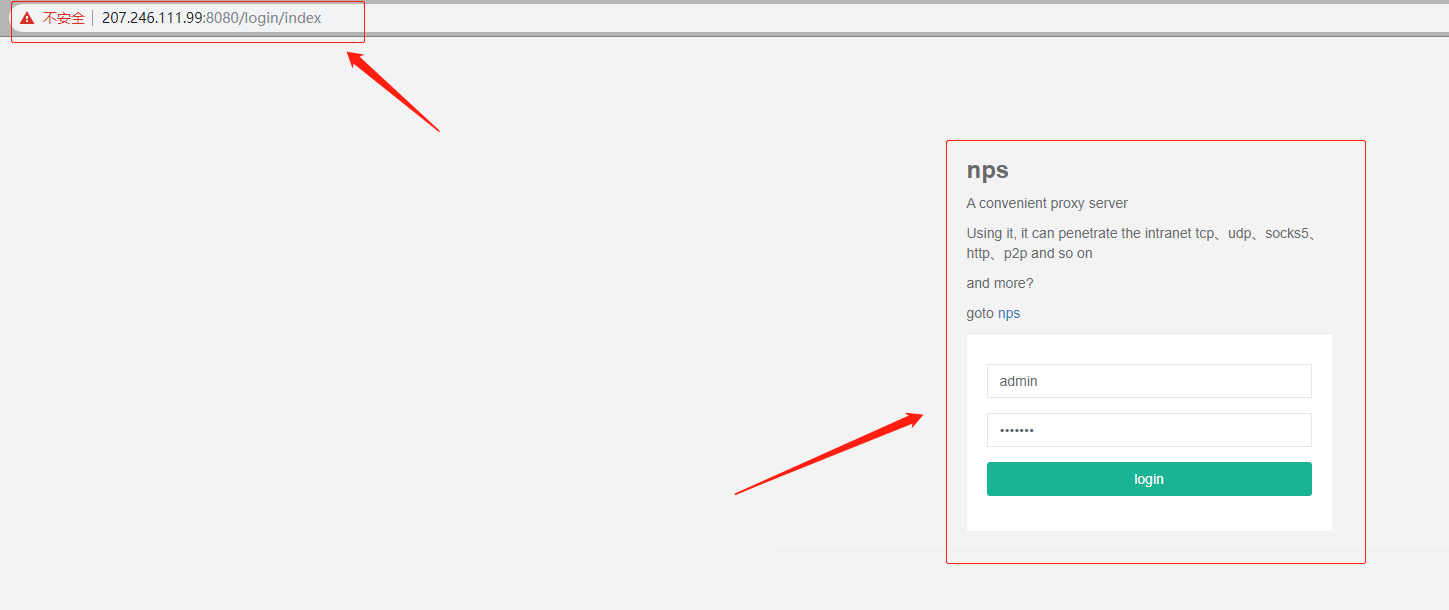
添加客户端
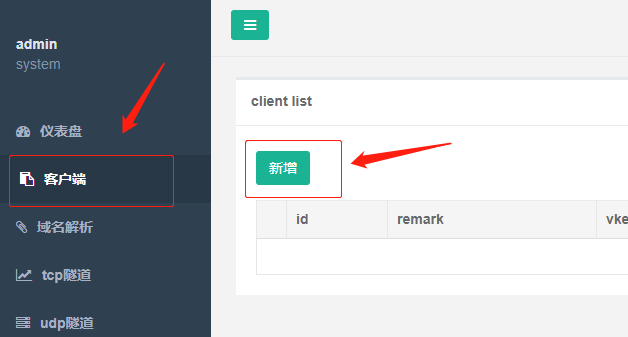
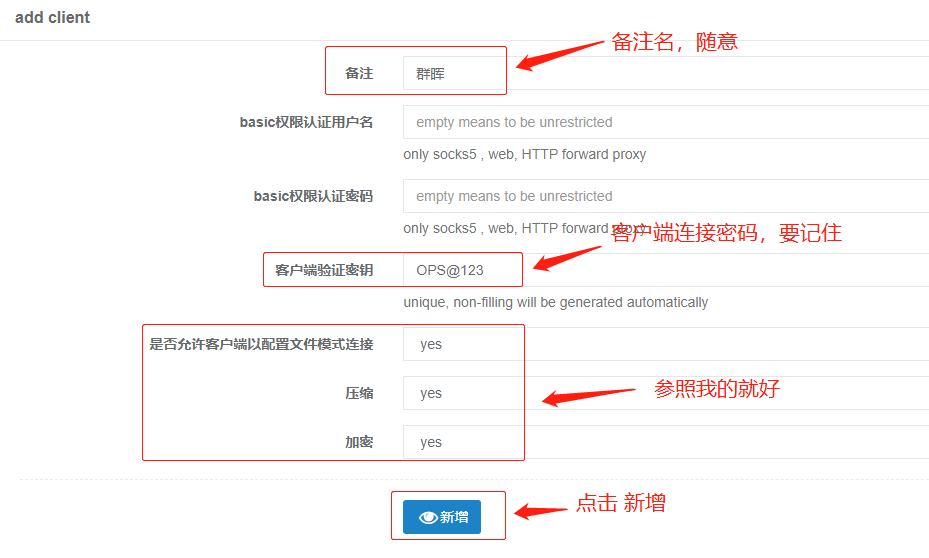
给对应客户端添加域名解析

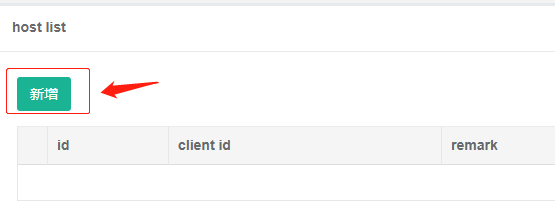
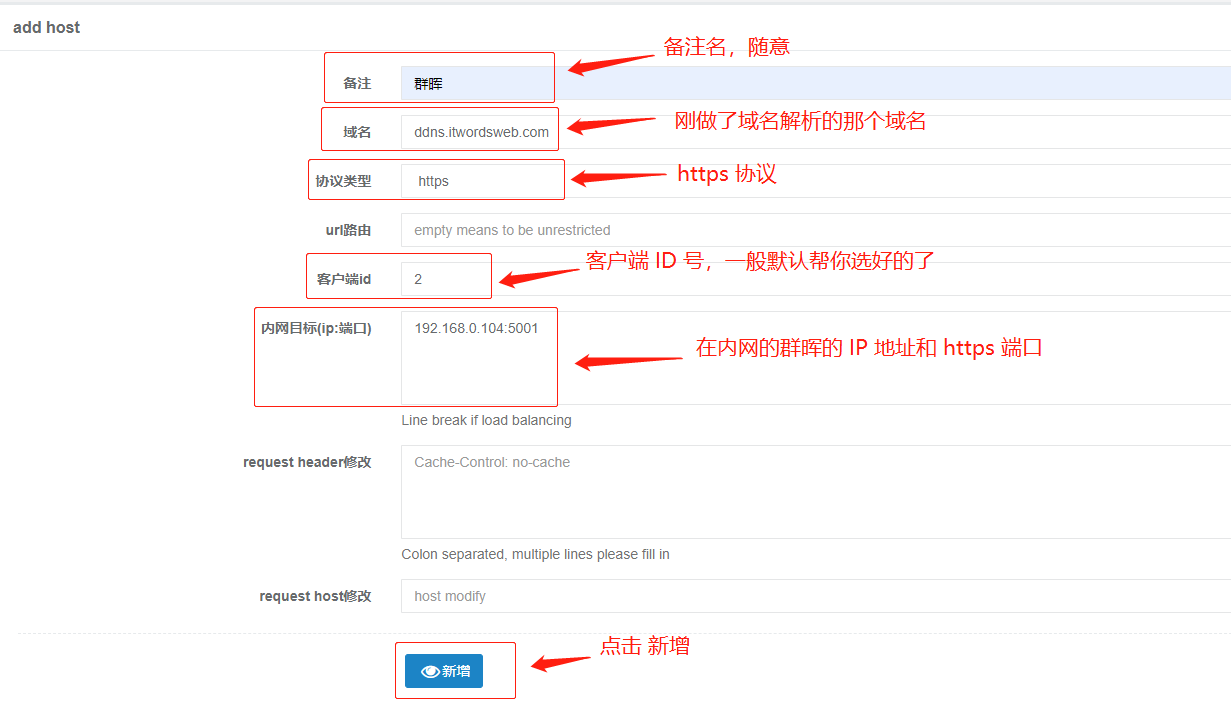
安装配置 nps 客户端
群晖基本配置
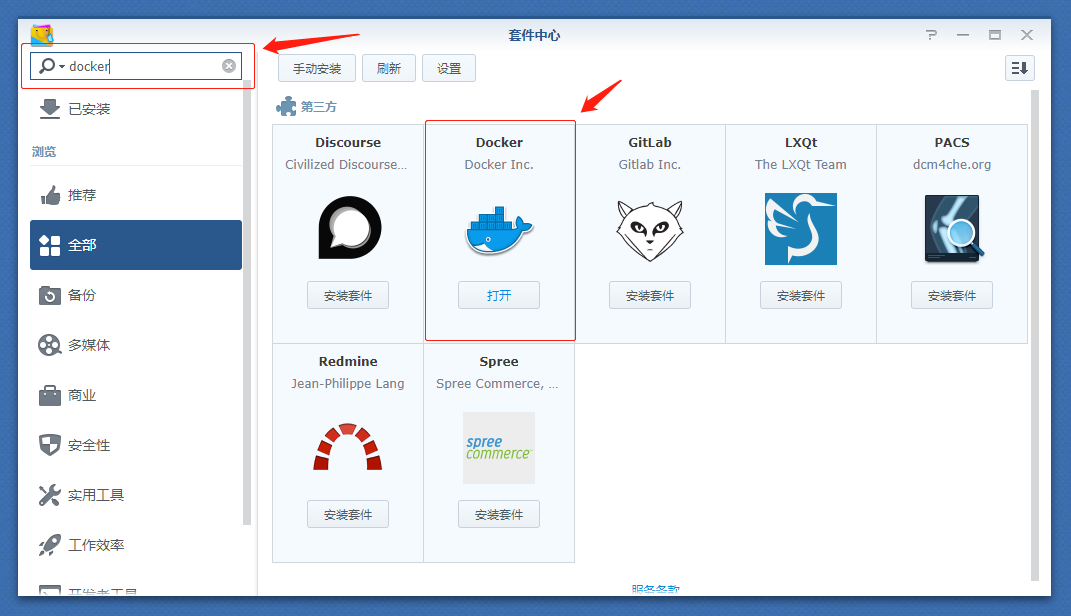
在群辉的套件中心安装 docker
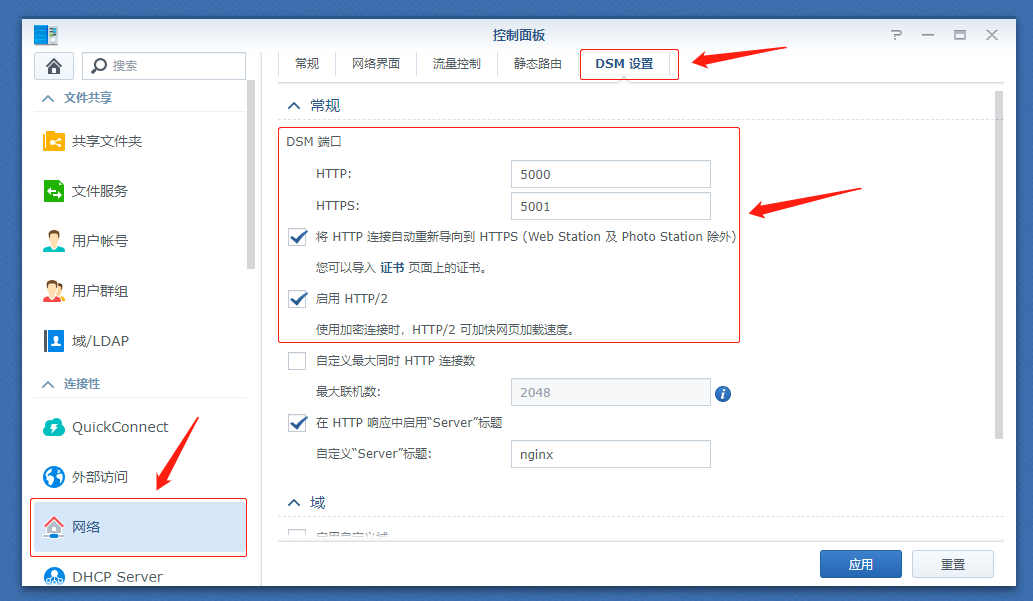
在群晖 控制面板 – 网络 – DSM 设置中配置 HTTPS ,同时也能见到群晖的 HTTPS 端口号,一般默认是 5001
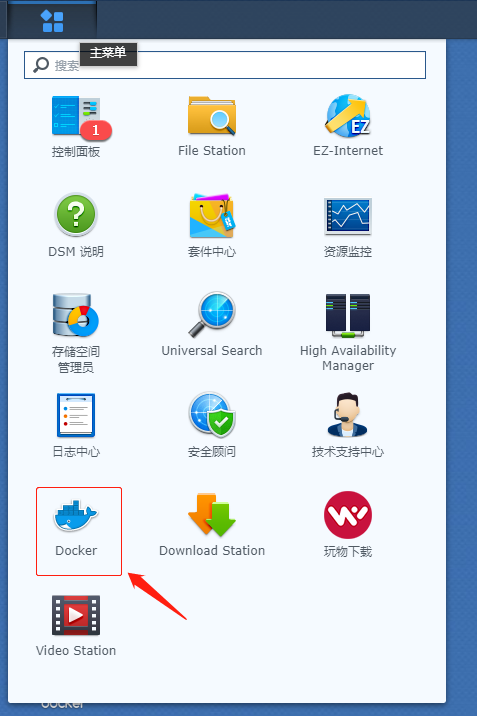
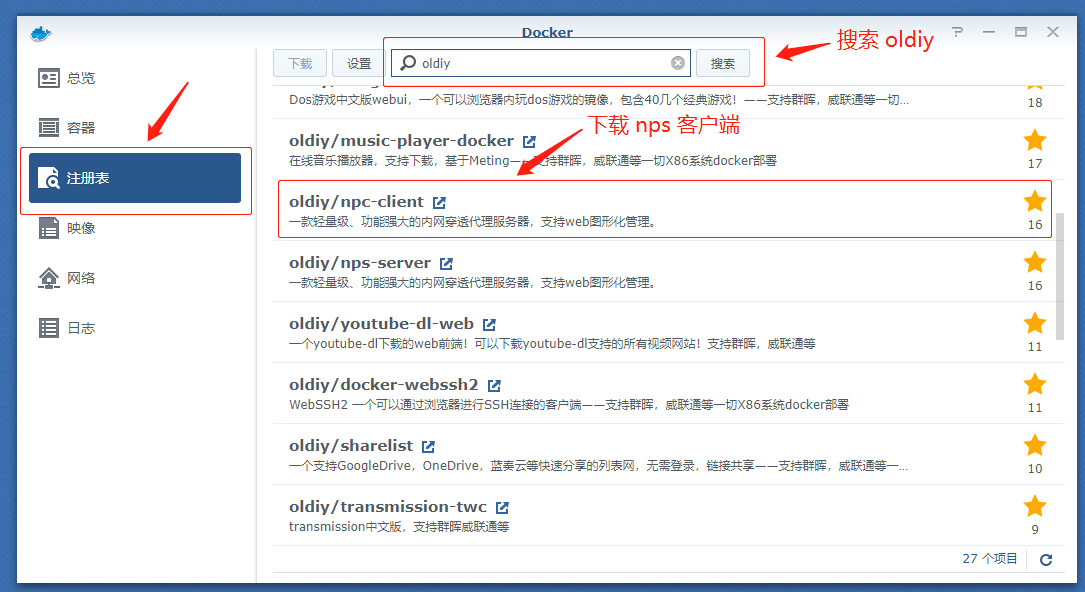
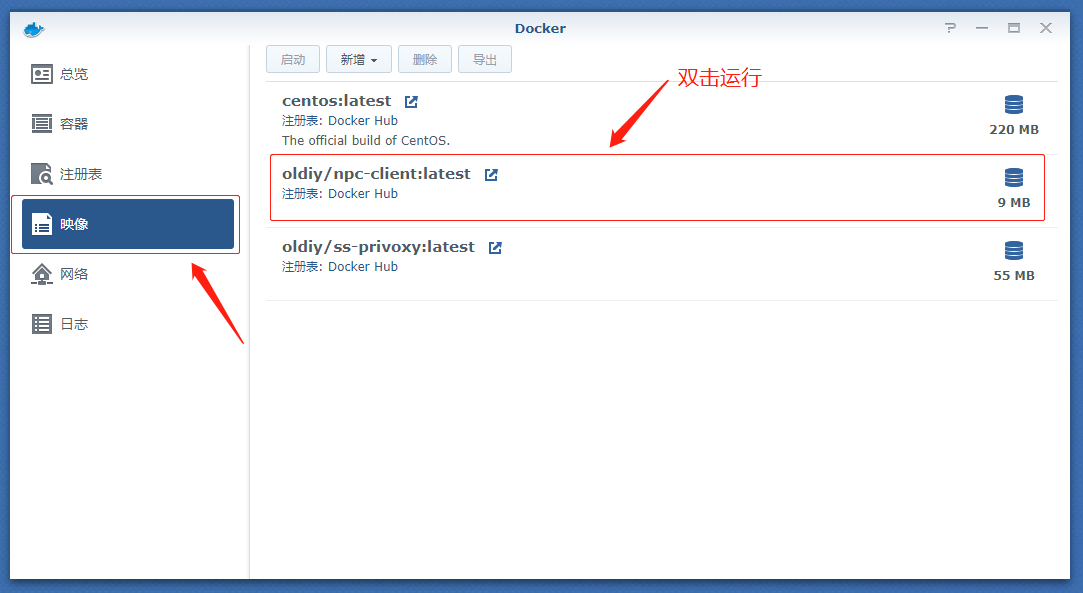
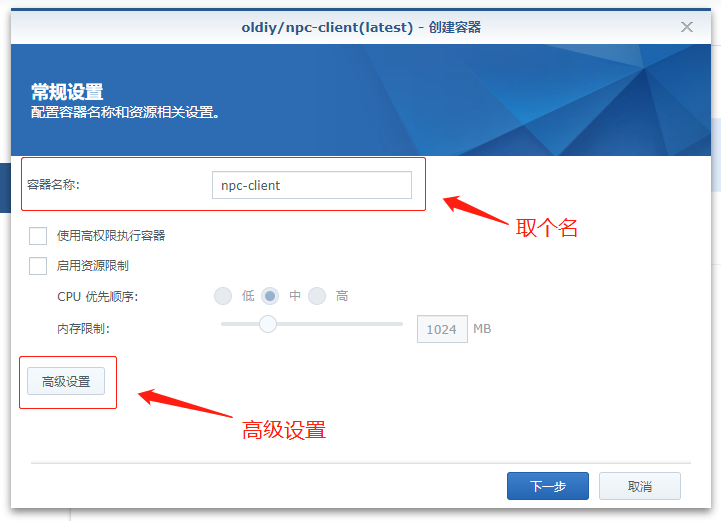
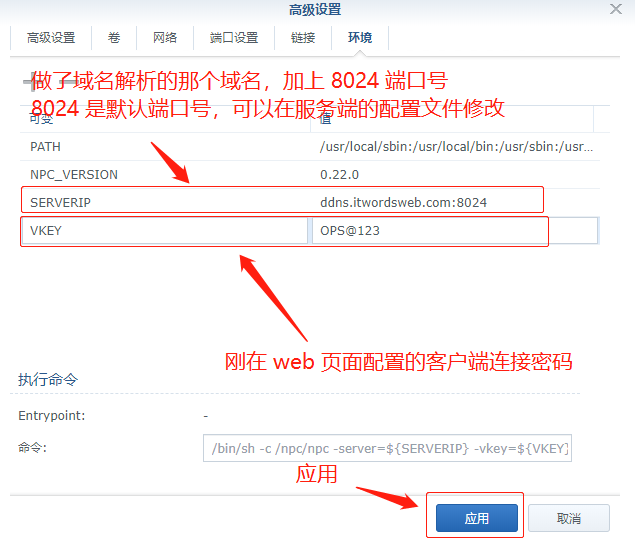
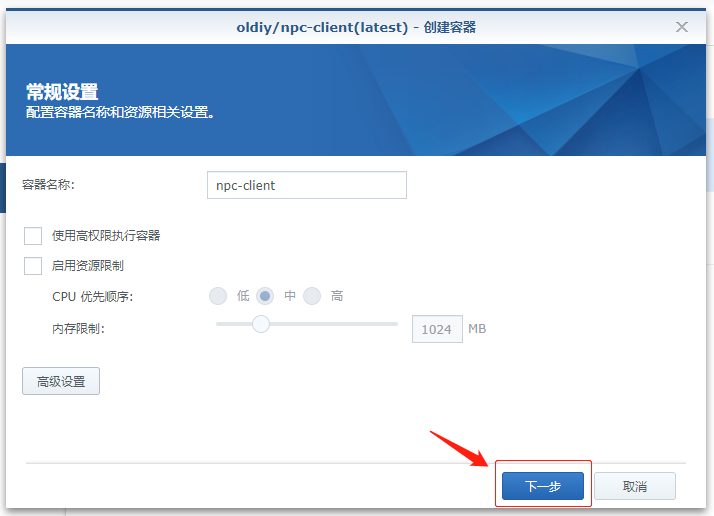
安装 docker nps 客户端

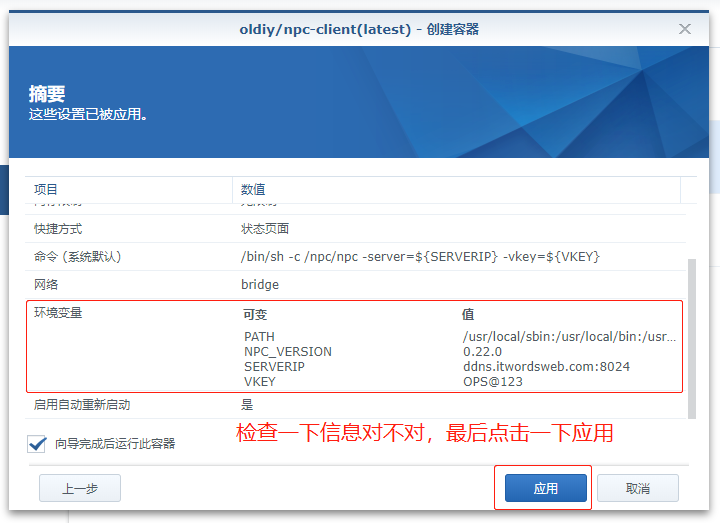
检查
返回 web 页面,可以见到客户端状态已经是 online,说明连接上来了

测试
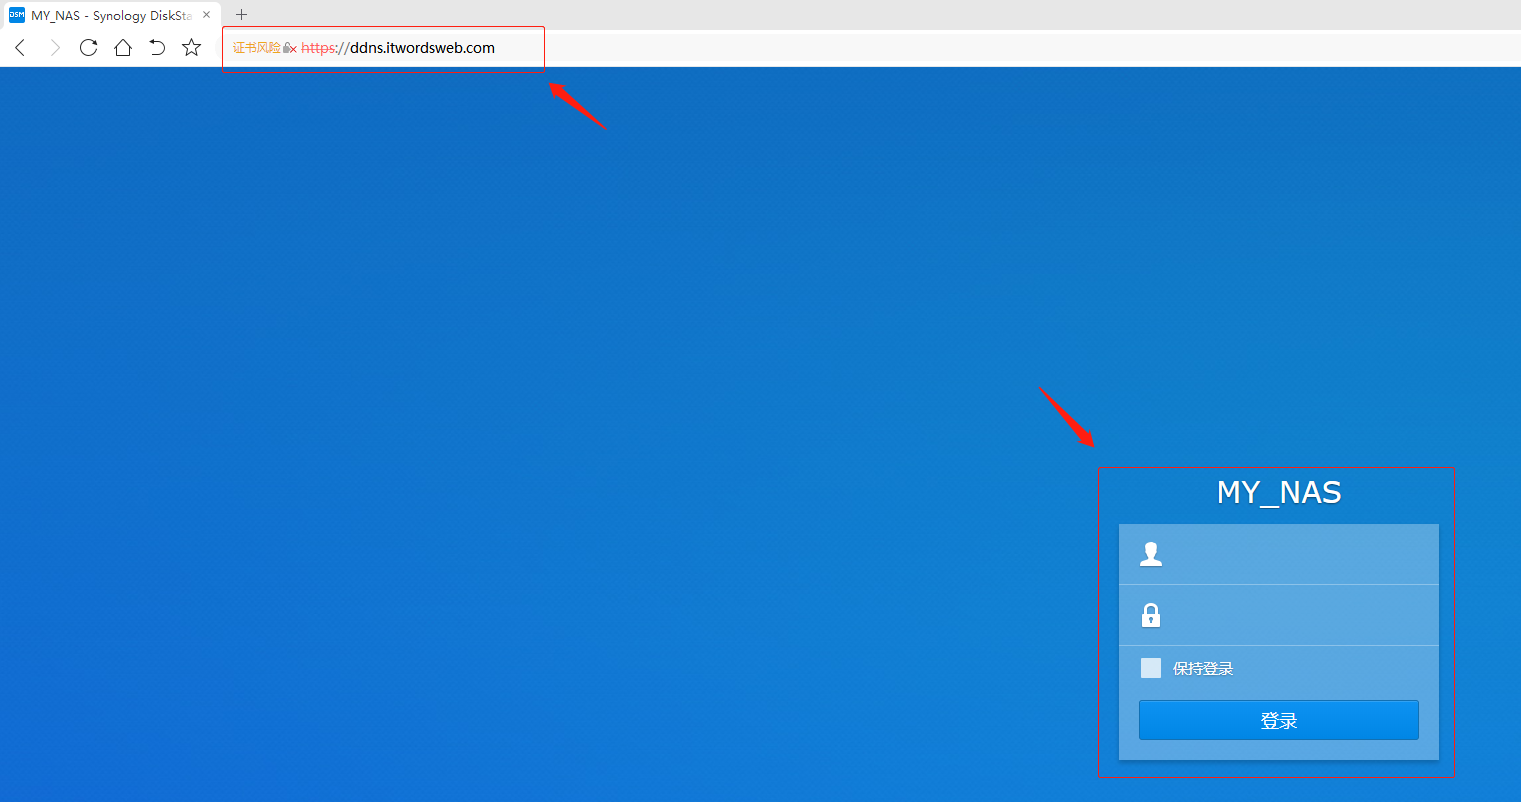
在外网的机器上,使用浏览器访问域名
可以见到,打开成功!
至此~群晖内网穿透就搞掂了!
 微信
微信
 支付宝
支付宝